Painting Stars: a Step-by-Step Tutorial
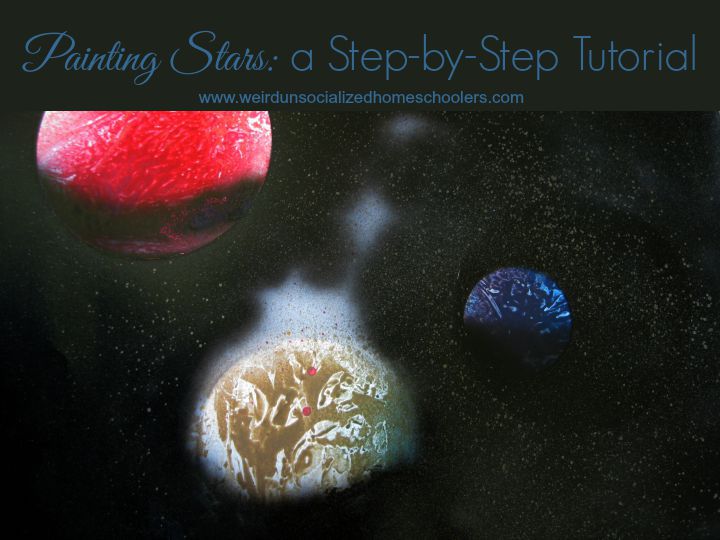
This is a fun, easy painting stars project for young kids (and their parents!) for an astronomy study on the stars and planets or a Bible study on Psalm 19.
Supplies Needed:
- White poster board
- Spray paint – one glossy black and other colors of your choosing
- Newspaper
- Drop cloth
- Variety of sizes of round pans, lids, or other items that can be discarded after use (the Dollar Store is a good source)
- Printed Copy of Psalm 19:1-6 (optional)
Step 1
Lay out your drop cloth and then take your poster board and be sure to place it so the glossy side is facing up for painting.
Step 2
Take your varying sized round shapes (lids, pans etc.) and lay them out where you want your stars to be placed on the poster board to get an idea of placement and what will fit.
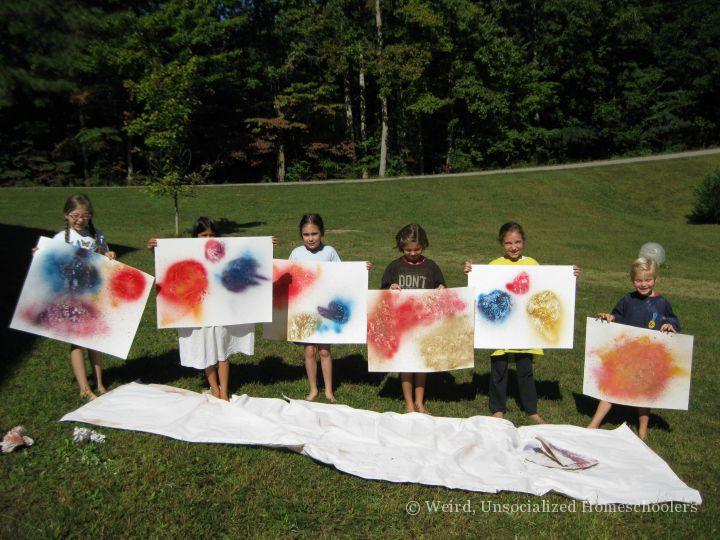
Once you have a layout in mind, remove them and spray paint your color combinations in each area where you want a star. (Mixing two or three colors is recommended for best effect.) Quickly spray the color combinations for one star at a time and lay newspaper over them for about 5 seconds then remove it to blot the design. The end result of this stage will look something like this:
Step 3
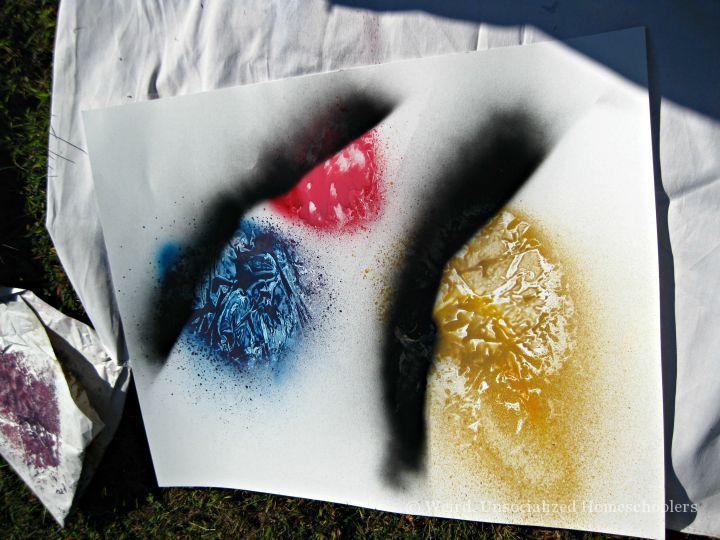
Once your “stars” have been spayed and blotted, decide on which side you want to create the shadow for each star (assuming the opposite side is the one facing the sun). This will be the same side for all the stars.
Then cover all but a parenthesis shaped space on the stars you painted in Step 2. Spray the glossy black paint lightly across this area a few times to create the “shadow.” The result should look like this:
Step 4
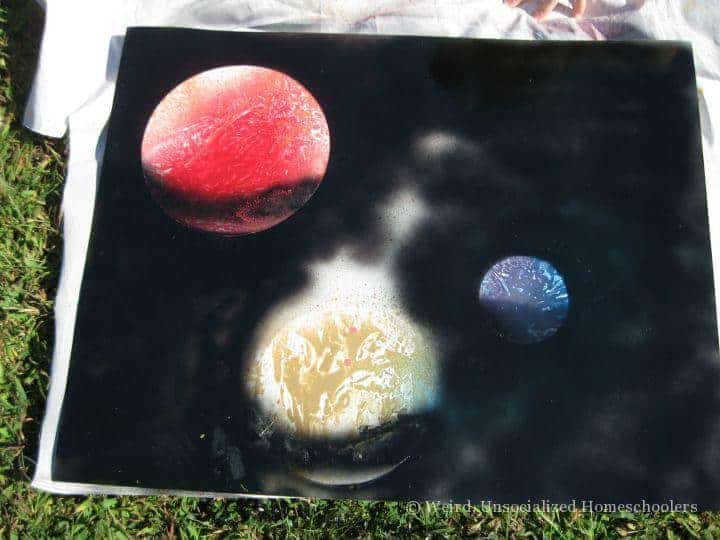
Once you have spayed your shadows, use your various-sized round objects to create the actual stars. Once your painted areas are dry to the touch, lay the round pans, lids, etc. over them, ensuring that you have a good portion of the “shadow” included in that diameter, as shown below:
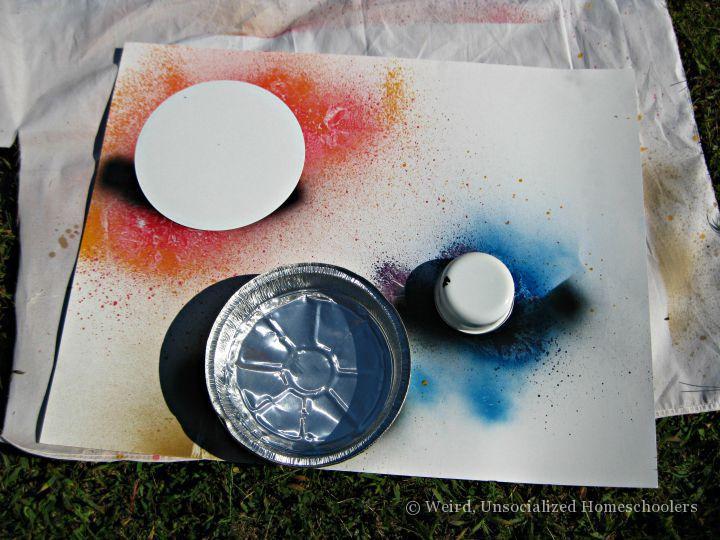
Then spray paint the rest of the board black to create the “space” background. Leave your circles covering your stars, take the star color you’ve chosen, and spray it a good distance away from the picture so the droplets will fall all over it and create smaller “stars” in the background. It will give it a “galaxy” look, like this:
Step 5 (optional)
Finally, glue a printout of Psalm 19:1-6 onto the poster board. It says:
“The heavens are telling of the glory of God;And their expanse is declaring the work of His hands.
2 Day to day pours forth speech,
And night to night reveals knowledge.
3 There is no speech, nor are there words;
Their voice is not heard.
4 Their line has gone out through all the earth,
And their utterances to the end of the world.
In them He has placed a tent for the sun,
5 Which is as a bridegroom coming out of his chamber;
It rejoices as a strong man to run his course.
6 Its rising is from one end of the heavens,
And its circuit to the other end of them; And there is nothing hidden from its heat.” – Psalm 19:1-6
The Psalmist would have had no way to know any of those Truths that we now know to be fact (except by revelation of God himself). We know that the sun is the center of our universe and it’s gravitational pull extends from its North Pole all the way around Pluto and back to its South Pole. The consistency of the universe declares for us that our God is consistent and never changing! Amen!
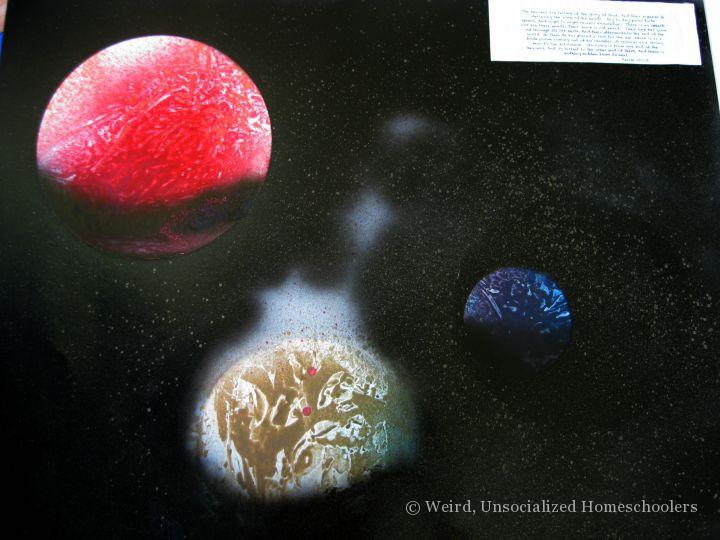
The end results are very impressive for what amounts to less than an hour’s worth of time, including drying times! This is a fun project to do this fall while the weather is nice out!
 Colleen Leonard can be found at Solagratiamom where she blogs about her classical education adventures with a creative twist! When she isn’t coming up with whacky fun experiments or history dress up ideas for kids, she is advocating for children with special needs in her local community and government. She has been married to her love for 20 years and has two adopted children she adores. A previous sales and marketing professional, her passion is creating visual and tangible ways for children to learn and marveling at our great God on nature walks! She has been homeschooling since 2004.
This article was written by a Weird, Unsocialized Homeschoolers guest author. See the author's full bio in the body of the post.


Wow, those turned out so well! Now the kids will have their beautiful, self-made artwork for their walls. AWESOME!